
How to Connect Gravity Forms to Monday.com with Zapier
Welcome to our tutorial on connecting Gravity Forms to Monday.com with Zapier, brought to you by Be Visible Web Design. This is great if you want customers to complete a form on your website and then send that info to Monday.com as a task for your team to work on.
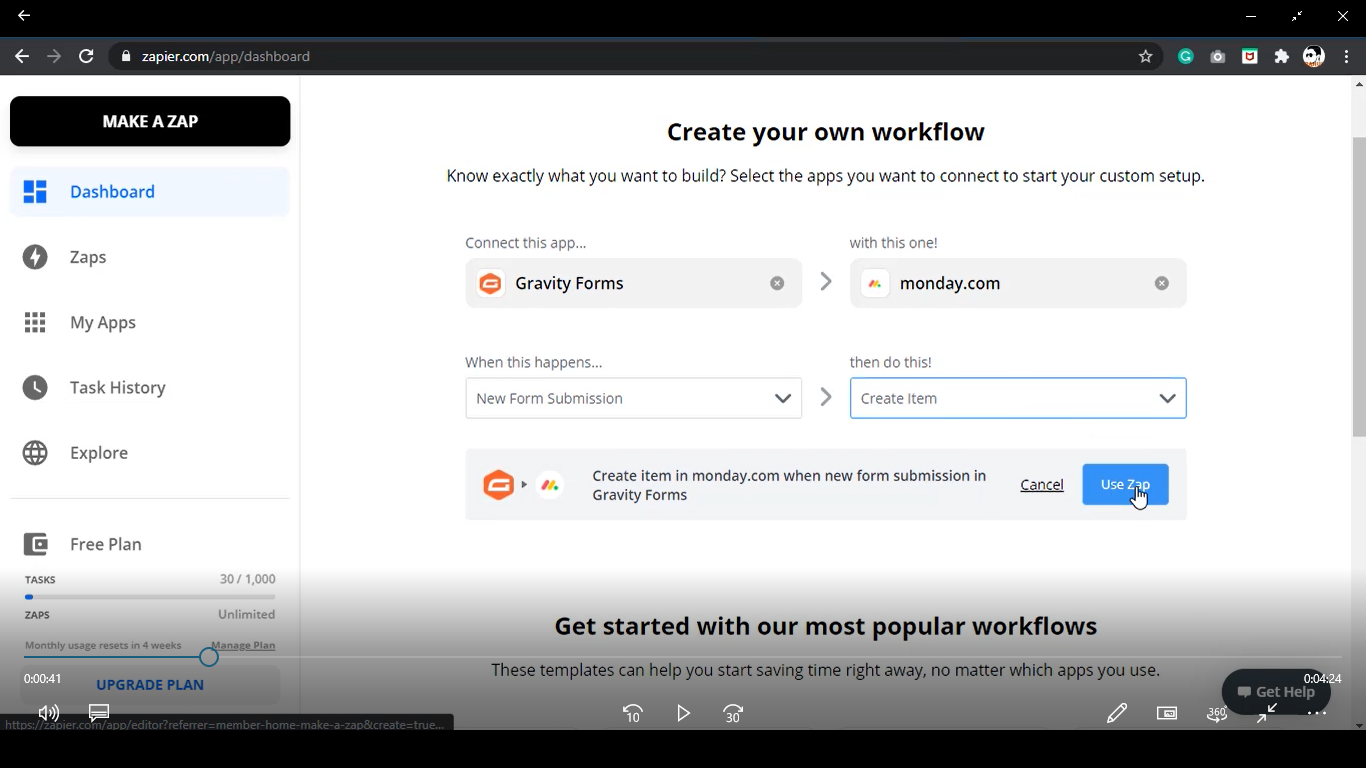
Start by going to Zapier.com and either creating an account, or signing in to your existing account.
Head to your dashboard and in the workflow section, select Gravity Forms, and Monday.com.
Next, select New Form Submission under When This Happens, and Create Item under Then Do This. Then click Create Zap.
When the next window appears, confirm that your triggers are correct, hit Continue, and then copy the webhook.
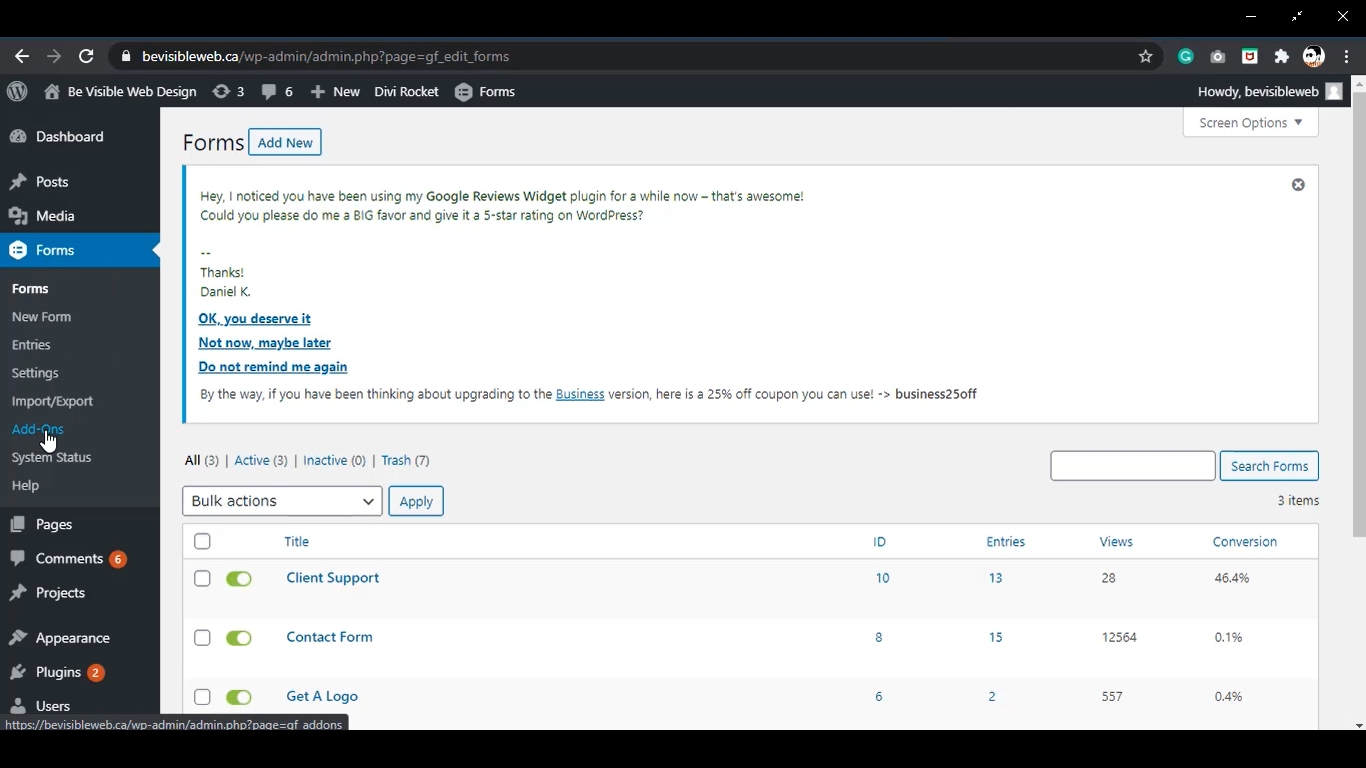
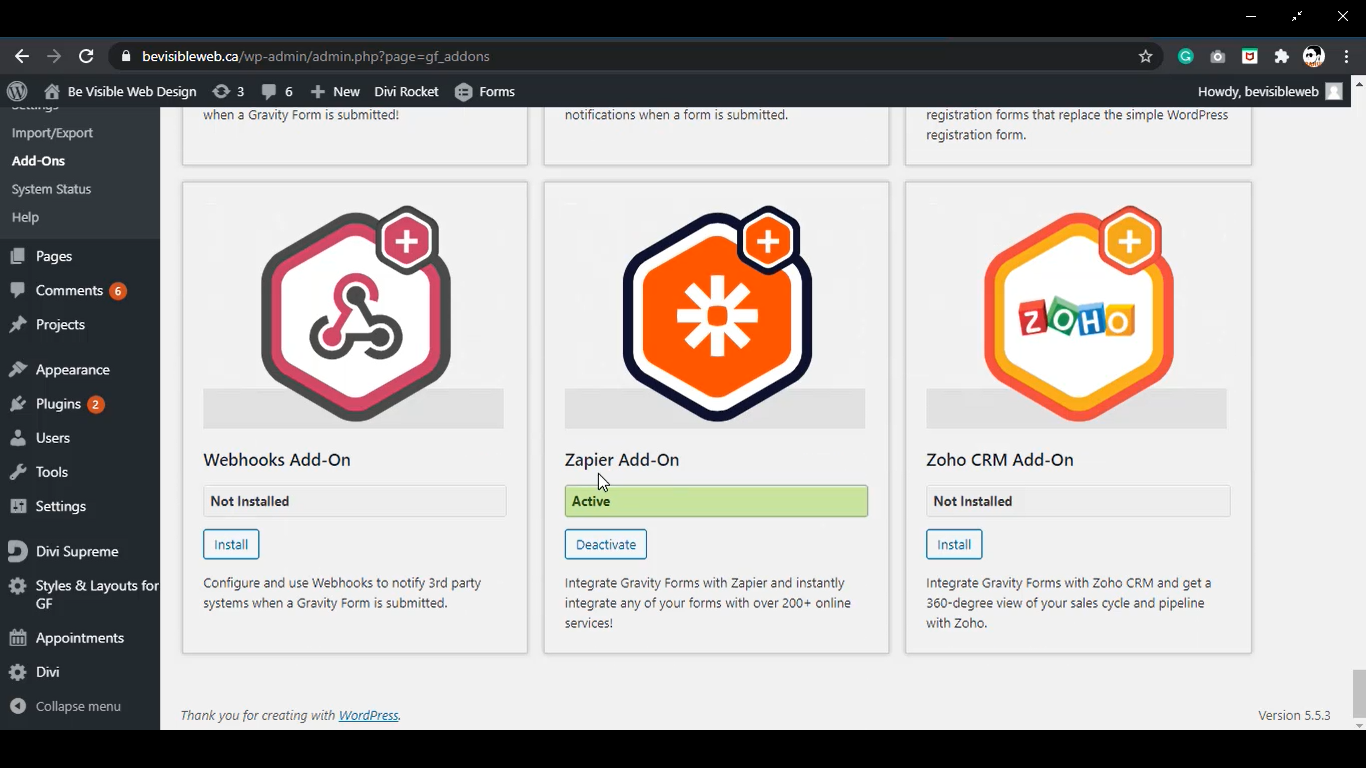
Next, toggle over to your website. Select Forms, then Add-Ons. Find your Zapier add-on, and ensure it is active.
Next, select your Form, and check that Zapier is now part of your Settings. Click on it, then click Add New, then Edit. This is where you will paste the webhook.
Update the Zapier feed, then click Edit.
Next, toggle back to Zapier, and click Test Trigger
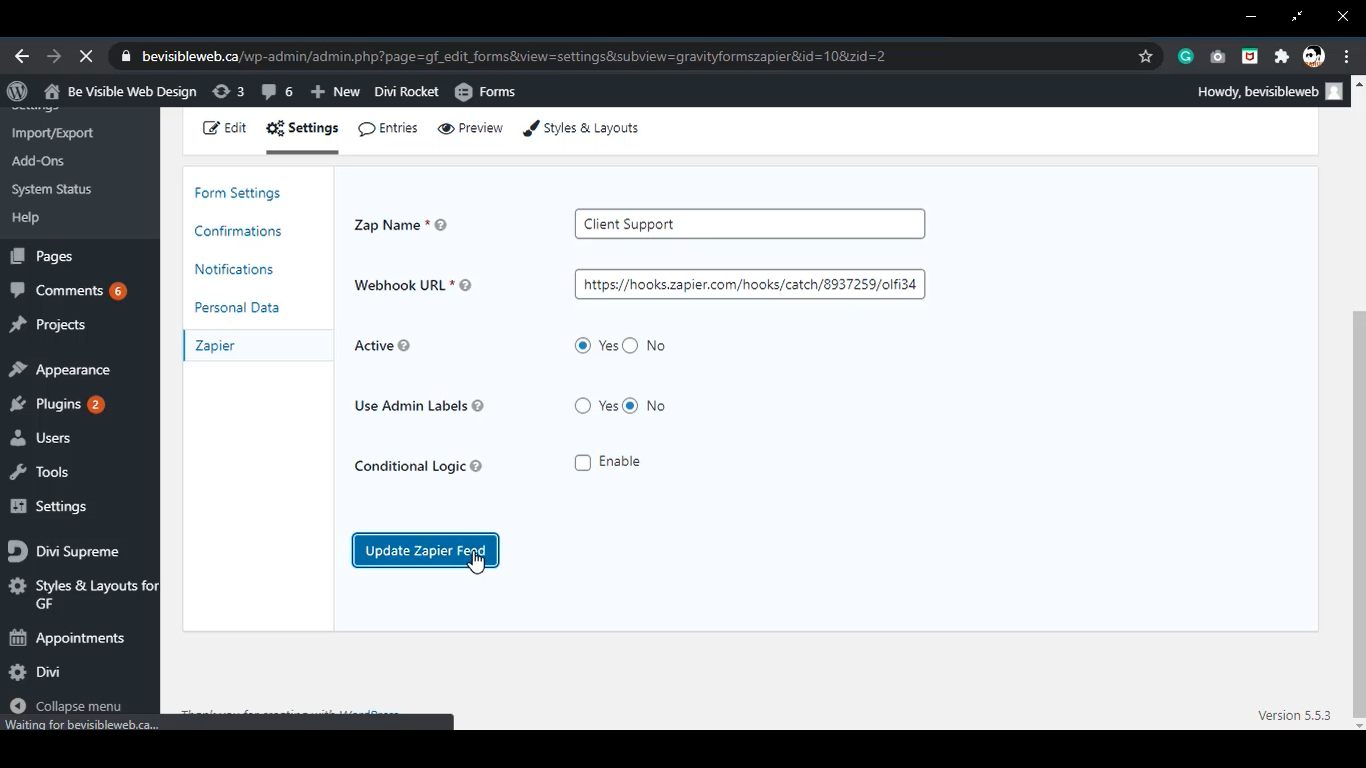
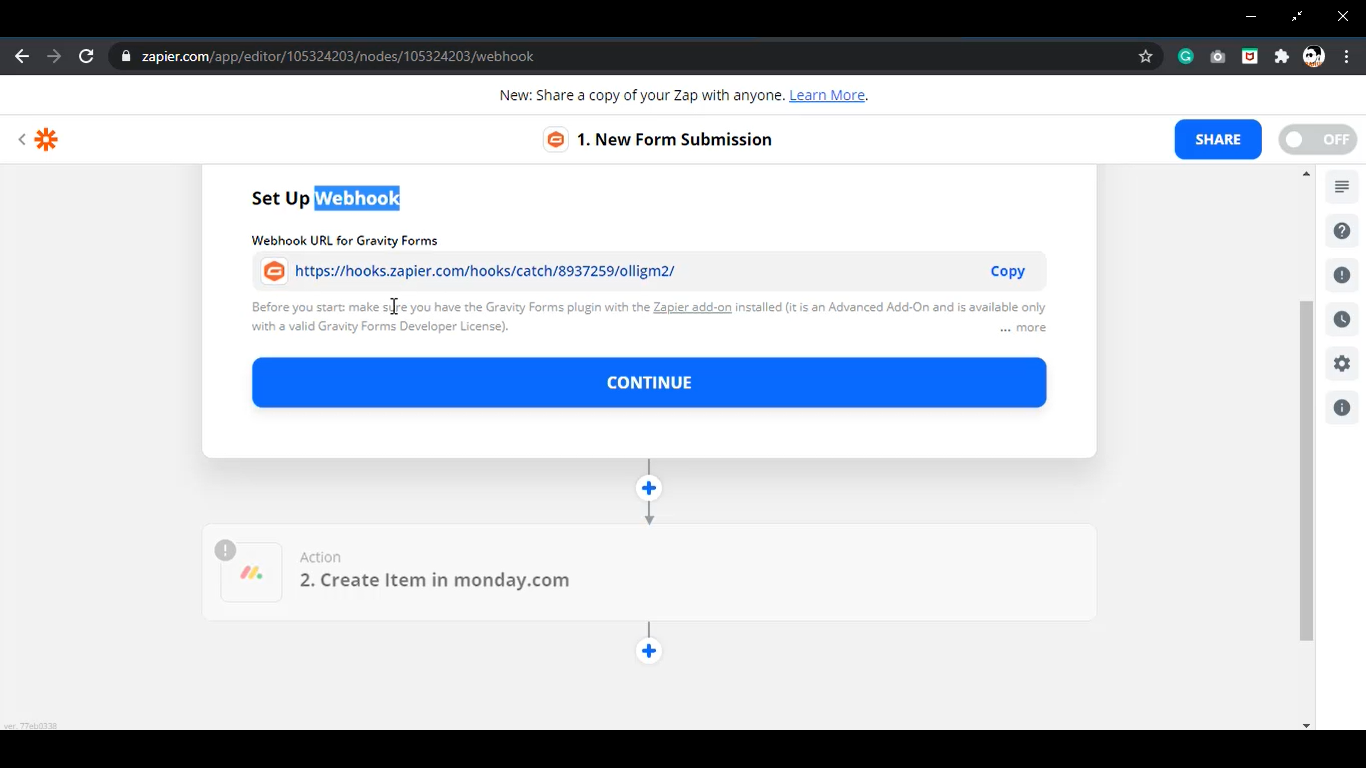
Next, you need to check that the triggers in your second action are correct. Once they are, select your new account. You will be prompted to enter an API key, which you will find in Monday.com under Admin, then API. Copy your API token, paste it into the Zapier prompt, then hit Continue.

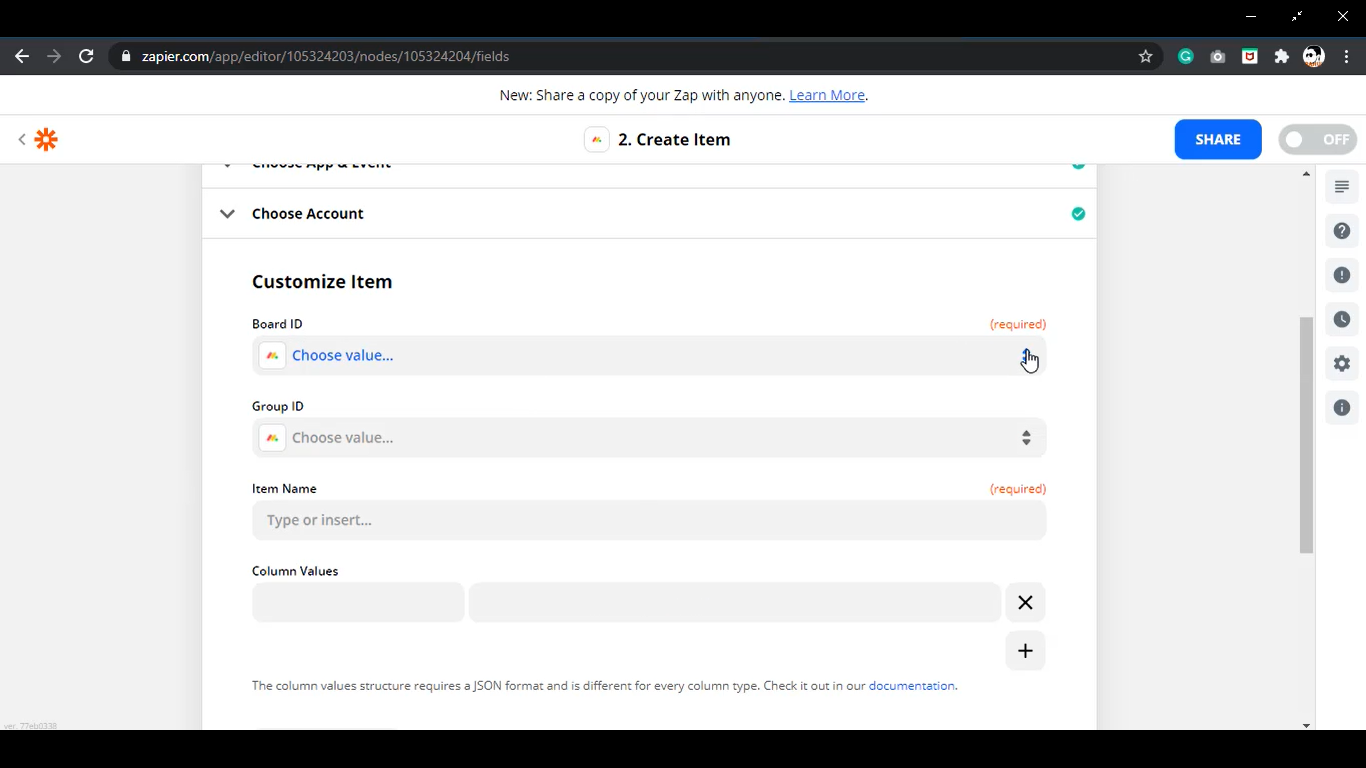
From here, you will need to input your Board ID, Group ID, and Item Name. Since we are just testing the trigger right now, we are only inputting a sample value here.
If the test is successful. Select the option to add Monday.com as an additional item.
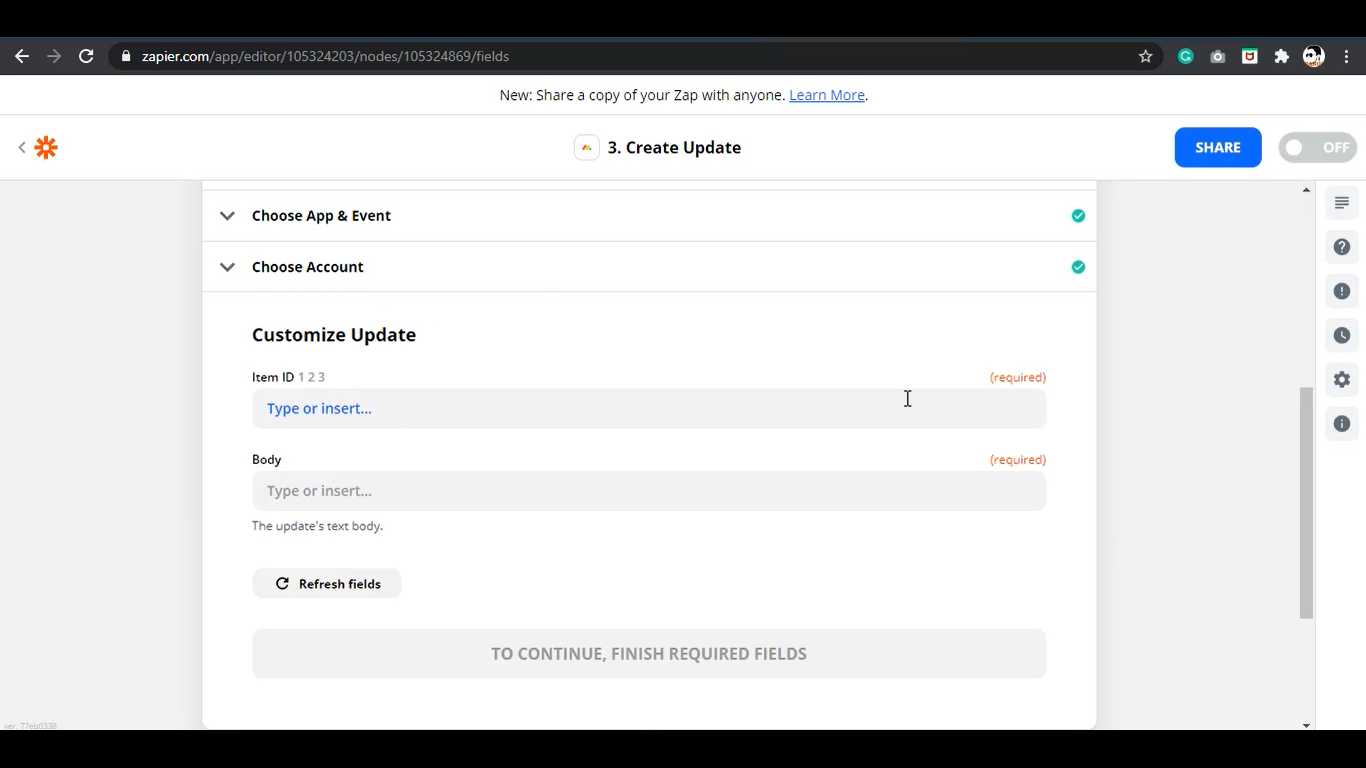
Under Choose App & Event, select Create Update, then Continue, and then link your Monday account when prompted.
This is when we can further customise our update, including inserting the data we need in our forms.
Once you have everything set up correctly, click Continue, and then Test & Review to try it out.
We can see that our form is displaying correctly in Monday, so now we will click Done Editing, and Turn on Zap.
Finally, let’s test the connection. Ensure the Zap is on and active, then head to your online form. Input the sample information, and hit Submit.
Toggle over to Monday to see if it’s working properly. It is!
We hope you found this tutorial helpful. If you want to improve your online presence, Be Visible Web Design is here for you!
Disclosure: The above links are affiliate links, meaning if you click through and purchase the product, we may make some money. Much appreciated. We really, truly only recommend things we love, and in most cases, like this one, have purchased ourselves. Really.

Recent Comments